Hello Triangle
In this tutorial, you'll create a renderer that draws a single colored triangle on screen. This is the classic starting point for graphics programming — establishing the graphics pipeline, defining vertex data, and issuing a draw call.
Overview
This tutorial covers:
- Defining a Slang shader with vertex and pixel stages
- Creating a vertex buffer with position and color data
- Configuring an input layout to describe vertex attributes
- Building a graphics pipeline with render states
- Recording and submitting command buffers to render a frame
The Renderer Class
Create the file Renderers/HelloTriangleRenderer.cs:
namespace ZenithTutorials.Renderers;

internal unsafe class HelloTriangleRenderer : IRenderer
{
    private const string ShaderSource = """
        struct VSInput
        {
            float3 Position : POSITION0;

            float4 Color : COLOR0;
        };

        struct PSInput
        {
            float4 Position : SV_POSITION;

            float4 Color : COLOR;
        };

        PSInput VSMain(VSInput input)
        {
            PSInput output;
            output.Position = float4(input.Position, 1.0);
            output.Color = input.Color;

            return output;
        }

        float4 PSMain(PSInput input) : SV_TARGET
        {
            return input.Color;
        }
        """;

    private readonly Buffer vertexBuffer;
    private readonly GraphicsPipeline pipeline;

    public HelloTriangleRenderer()
    {
        Vertex[] vertices =
        [
            new(new( 0.0f,  0.5f, 0.0f), new(1.0f, 0.0f, 0.0f, 1.0f)),
            new(new( 0.5f, -0.5f, 0.0f), new(0.0f, 1.0f, 0.0f, 1.0f)),
            new(new(-0.5f, -0.5f, 0.0f), new(0.0f, 0.0f, 1.0f, 1.0f)),
        ];

        vertexBuffer = App.Context.CreateBuffer(new()
        {
            SizeInBytes = (uint)(sizeof(Vertex) * vertices.Length),
            StrideInBytes = (uint)sizeof(Vertex),
            Flags = BufferUsageFlags.Vertex | BufferUsageFlags.MapWrite
        });
        vertexBuffer.Upload(vertices, 0);

        InputLayout inputLayout = new();
        inputLayout.Add(new() { Format = ElementFormat.Float3, Semantic = ElementSemantic.Position });
        inputLayout.Add(new() { Format = ElementFormat.Float4, Semantic = ElementSemantic.Color });

        using Shader vertexShader = App.Context.LoadShaderFromSource(ShaderSource, "VSMain", ShaderStageFlags.Vertex);
        using Shader pixelShader = App.Context.LoadShaderFromSource(ShaderSource, "PSMain", ShaderStageFlags.Pixel);

        pipeline = App.Context.CreateGraphicsPipeline(new()
        {
            RenderStates = new()
            {
                RasterizerState = RasterizerStates.CullNone,
                DepthStencilState = DepthStencilStates.Default,
                BlendState = BlendStates.Opaque
            },
            Vertex = vertexShader,
            Pixel = pixelShader,
            ResourceLayout = null,
            InputLayouts = [inputLayout],
            PrimitiveTopology = PrimitiveTopology.TriangleList,
            Output = App.FrameBuffer.Output
        });
    }

    public void Update(double deltaTime)
    {
    }

    public void Render()
    {
        CommandBuffer commandBuffer = App.Context.Graphics.CommandBuffer();

        commandBuffer.BeginRenderPass(App.FrameBuffer, new()
        {
            ColorValues = [new(0.1f, 0.1f, 0.1f, 1.0f)],
            Depth = 1.0f,
            Stencil = 0,
            Flags = ClearFlags.All
        });

        commandBuffer.SetPipeline(pipeline);
        commandBuffer.SetVertexBuffer(vertexBuffer, 0, 0);
        commandBuffer.Draw(3, 1, 0, 0);

        commandBuffer.EndRenderPass();

        commandBuffer.Submit(waitForCompletion: true);
    }

    public void Resize(uint width, uint height)
    {
    }

    public void Dispose()
    {
        pipeline.Dispose();
        vertexBuffer.Dispose();
    }
}

[StructLayout(LayoutKind.Sequential)]
file struct Vertex(Vector3 position, Vector4 color)
{
    public Vector3 Position = position;

    public Vector4 Color = color;
}
Running the Tutorial
Run the application and select 1. Hello Triangle from the menu:
dotnet run
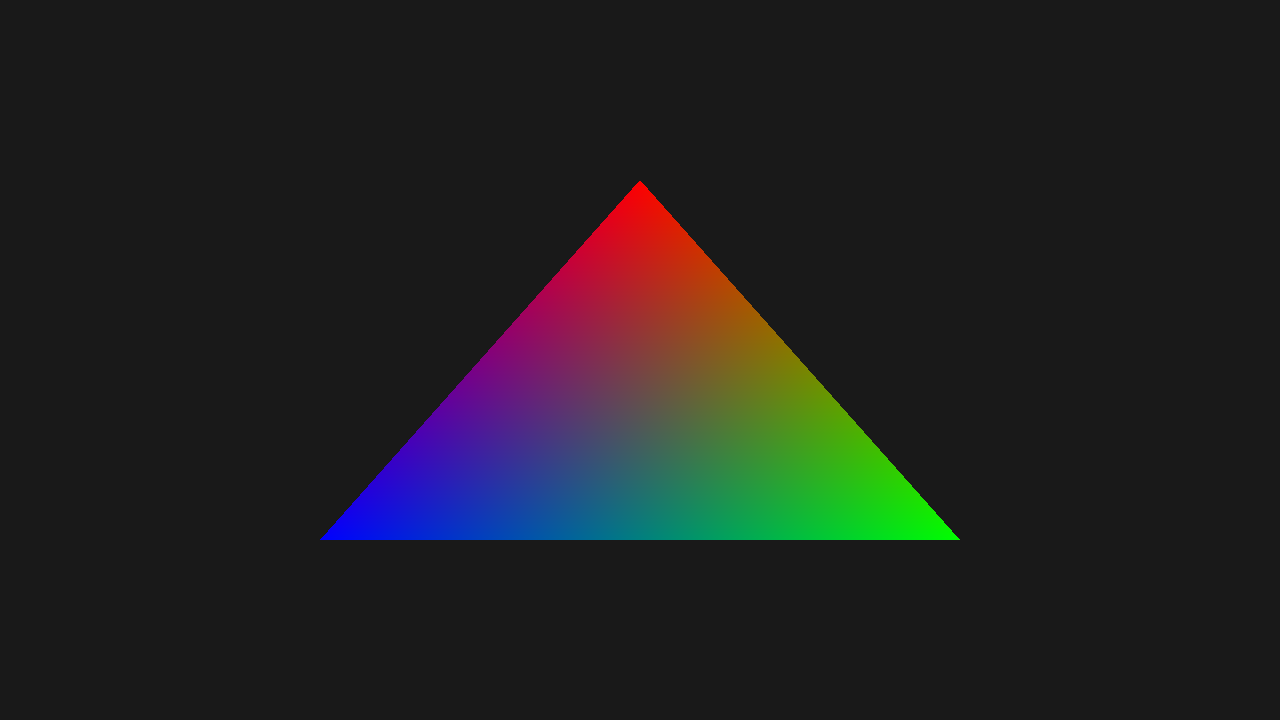
Result
Code Breakdown
Shader
The shader is written inline as a Slang source string. It defines two stages:
private const string ShaderSource = """
    struct VSInput
    {
        float3 Position : POSITION0;

        float4 Color : COLOR0;
    };

    struct PSInput
    {
        float4 Position : SV_POSITION;

        float4 Color : COLOR;
    };

    PSInput VSMain(VSInput input)
    {
        PSInput output;
        output.Position = float4(input.Position, 1.0);
        output.Color = input.Color;

        return output;
    }

    float4 PSMain(PSInput input) : SV_TARGET
    {
        return input.Color;
    }
    """;
- VSMain: Converts the 3D position to clip space and passes the color through
- PSMain: Outputs the interpolated vertex color
Vertex Data
Three vertices define the triangle with red, green, and blue colors:
Vertex[] vertices =
[
    new(new( 0.0f,  0.5f, 0.0f), new(1.0f, 0.0f, 0.0f, 1.0f)),
    new(new( 0.5f, -0.5f, 0.0f), new(0.0f, 1.0f, 0.0f, 1.0f)),
    new(new(-0.5f, -0.5f, 0.0f), new(0.0f, 0.0f, 1.0f, 1.0f)),
];
The Vertex struct is defined as a file-scoped type with sequential layout:
[StructLayout(LayoutKind.Sequential)]
file struct Vertex(Vector3 position, Vector4 color)
{
    public Vector3 Position = position;

    public Vector4 Color = color;
}
Vertex Buffer
The buffer is created with Vertex | MapWrite flags. MapWrite enables CPU-side uploads:
vertexBuffer = App.Context.CreateBuffer(new()
{
    SizeInBytes = (uint)(sizeof(Vertex) * vertices.Length),
    StrideInBytes = (uint)sizeof(Vertex),
    Flags = BufferUsageFlags.Vertex | BufferUsageFlags.MapWrite
});
vertexBuffer.Upload(vertices, 0);
Input Layout
The input layout tells the pipeline how to interpret vertex data. The order must match the shader's VSInput:
InputLayout inputLayout = new();
inputLayout.Add(new() { Format = ElementFormat.Float3, Semantic = ElementSemantic.Position });
inputLayout.Add(new() { Format = ElementFormat.Float4, Semantic = ElementSemantic.Color });
Graphics Pipeline
The pipeline binds everything together — shaders, render states, input layout, and output format:
pipeline = App.Context.CreateGraphicsPipeline(new()
{
    RenderStates = new()
    {
        RasterizerState = RasterizerStates.CullNone,
        DepthStencilState = DepthStencilStates.Default,
        BlendState = BlendStates.Opaque
    },
    Vertex = vertexShader,
    Pixel = pixelShader,
    ResourceLayout = null,
    InputLayouts = [inputLayout],
    PrimitiveTopology = PrimitiveTopology.TriangleList,
    Output = App.FrameBuffer.Output
});
| Property | Value | Purpose |
|---|---|---|
RasterizerState |
CullNone |
No face culling (both sides visible) |
DepthStencilState |
Default |
Standard depth testing |
BlendState |
Opaque |
No transparency |
ResourceLayout |
null |
No bound resources needed |
PrimitiveTopology |
TriangleList |
Every 3 vertices form a triangle |
Rendering
Each frame, a command buffer records the draw commands:
CommandBuffer commandBuffer = App.Context.Graphics.CommandBuffer();

commandBuffer.BeginRenderPass(App.FrameBuffer, new()
{
    ColorValues = [new(0.1f, 0.1f, 0.1f, 1.0f)],
    Depth = 1.0f,
    Stencil = 0,
    Flags = ClearFlags.All
});

commandBuffer.SetPipeline(pipeline);
commandBuffer.SetVertexBuffer(vertexBuffer, 0, 0);
commandBuffer.Draw(3, 1, 0, 0);

commandBuffer.EndRenderPass();

commandBuffer.Submit(waitForCompletion: true);
Draw(3, 1, 0, 0) draws 3 vertices, 1 instance, starting at vertex 0 and instance 0.
Note that BeginRenderPass does not pass a ResourceTable because this renderer has no bound resources.
Resource Cleanup
All GPU resources must be disposed in reverse order of creation:
public void Dispose()
{
    pipeline.Dispose();
    vertexBuffer.Dispose();
}
Next Steps
- Textured Quad - Add textures, index buffers, and samplers
Source Code
Tip
View the complete source code on GitHub: HelloTriangleRenderer.cs